Tuesday, October 13, 2015

DIY Tombstones

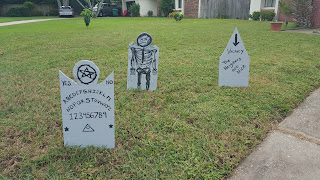
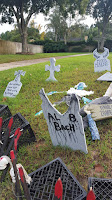
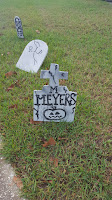
This Halloween I wanted to have a mass grave site in our
front yard and we already had a few (6) but 
it was not enough to get the look that I was going for.
And as everyone knows I'd rather not spend a lot
of money so I thought why not make my own.
I found a pin on Pinterest where the site used Styrofoam
from a hardware store and then they used their fancy
cutting machine to cut out the shapes and engrave 
the tombstone sayings.
Well I bought a Dollar Tree saw and it fell apart the second
I started cutting so DON'T DO IT!
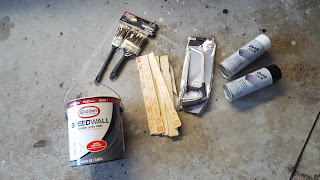
Supplies:
  • 6 pack insulation foam ($10) - makes 12
  • Gallon of light gray paint ($10) - only used 1/3 so I suggest a smaller size
  • Box cutter
  • Black acrylic paint
  • Large & small paint brushes
  • Black & white spray paint for effect (optional) ($.98 each)
  • Plastic throw away gloves
  • Paint sticks or wire hangers to stake in the ground
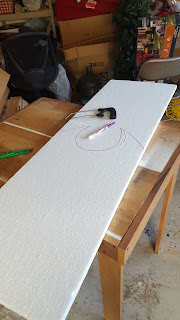
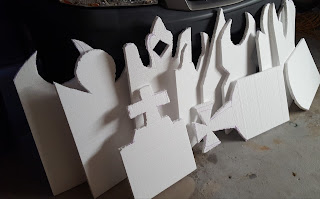
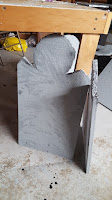
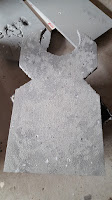
First outline the design with a marker to where 2 designs fit on 1 board
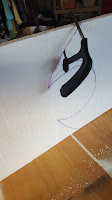
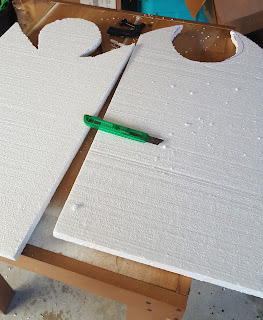
Second cut out the design with a box cutter which is really easy.
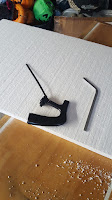
The picture shows the saw that broke after a couple of moves
I then rubbed off the access Styrofoam (there will be a
big mess so do this outside!)
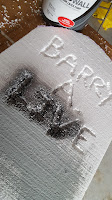
On some of them I etched out the saying,
I sprayed painted the words in black which was a big
no-no, I guess something in the spray paint melts
the Styrofoam but regular wall paint & acrylic paint is fine
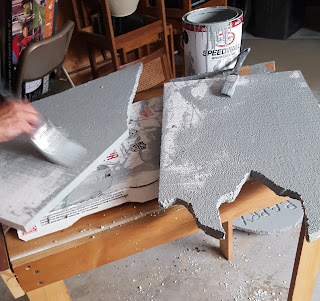
After all the boards are cut out I painted the front and sides gray
and then let them dry for a day and painted the backs.
A second layer was not needed and I only used 1/3 of
the can & we'll be able to use the another time.
I wanted to make some of the tombstones look older so I
used a spackle/spray method (I don't know the official name) where
you put your finger almost covering the paint spray hole (use the
plastic glove for this) and then shook the can 5 or so inches away from
the tombstone. This creates little dots which gives it an older look.
I uses both white and black for this.
Also I sprayed the black 8 inches away from some of them
to give it a darker gray look.
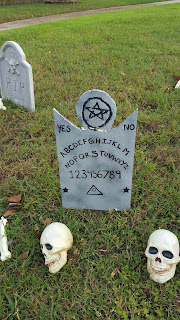
I googled some stupid/spooky/funny tombstone sayings
and painted it on with acrylic paint.
Some tombstones I made a drippy look with
watered down black paint.
After everything was dry I used both paint sticks & wire hangers
as spikes to secure them in the ground.
The paint sticks I tried to stick half way into the
Styrofoam (did not work) and also tried hot gluing the
paint sticks on the back (does not stick to paint).
The best method is taking apart a wire hanger and cutting
it into 4 pieces. I stuck 2 pieces into each tombstone so
it would be more stable.

So far they are sticking up!
Tuesday, September 8, 2015

Easy Halloween DIY

It's almost that magical time of the year!
Last year I made a couple of super easy projects. 

A swarm of bat's flying in
I cut out three different sizes of bat's on black construction paper. I think 
I ended up with 50-60 bat's. I used duct tape to stick them to the ceiling
but I strongly suggest another alternative because when my boyfriend 
took them down (without patience) it took some ceiling paint with it.
I made the swarm look as if it came from our front door and led out to the patio.


Creepy Crawly Spiders

I bought a package of black plastic spider rings
from Dollar tree and cut the ring part
off of the spider (tiresome after a few).
I then cut out small rectangles from large flat magnets
(I used to work at Dunkin Donuts and they were replacing 
doughnut magnet labels so I took the old ones)
Then I hot glued the magnet to the spider and created a swarm.
Easy-peasy 

Supplies:
  • Acrylic paint (orange and yellow)
  • Paint brushes
  • Paper plates 
  • Scissors
  • String
  • Tape

Paint the outer layer of the plate (closest to the edge) with
orange paint. Next ring paint yellow and the inner ring
 is already white naturally. After it drys, cut the plate like
a pie in 6 pieces. Tape string to the back and string around the house. 


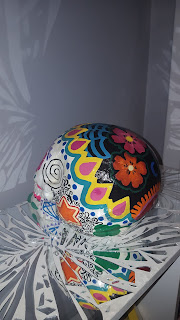
Ceramic Skull

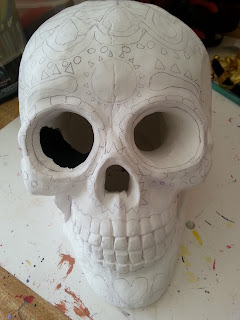
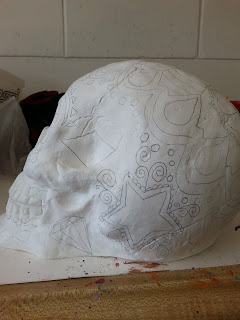
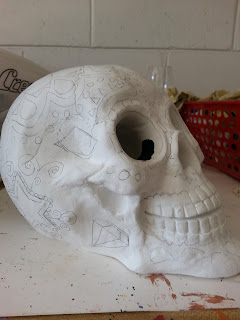
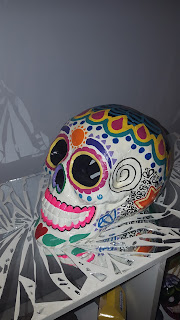
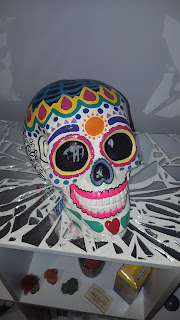
For my 20th Birthday Maria got me a ceramic skull from Jo-Ann's
and it took me about a year to figure out how I would decorate it.

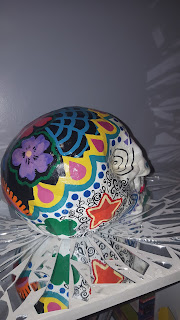
I outlined my design in pencil and then painted the details. 


Finished product


On a side note I am actually repainting this soon. 
I like change so I change things up  a lot.

Friday, September 4, 2015

Paintings

Every once in a while I concentrate and paint something that usually
takes a lot of time. Most of the time my paintings are
given as gifts but here are a few.

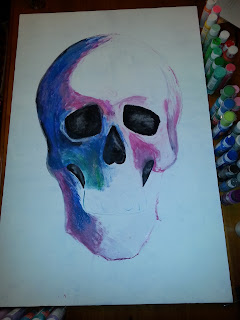
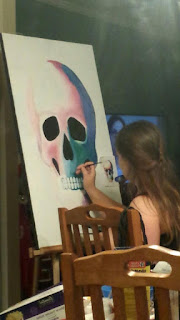
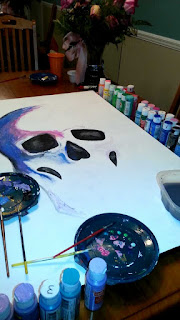
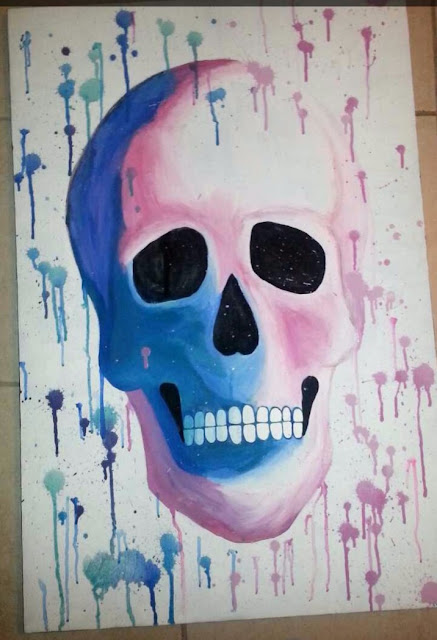
Kristina's x-mas gift
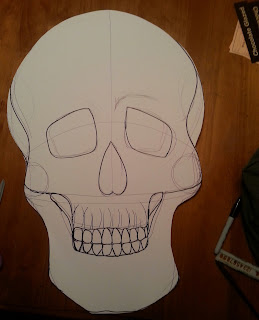
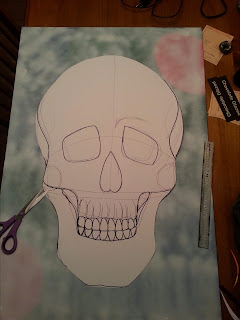
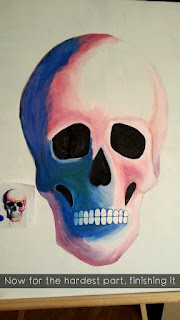
I traced out a skull & cut it out
and then traced the cut out onto a canvas 
(BTW I reuse every canvas, meaning I buy already 
used canvas at the thrift store and paint over it) 
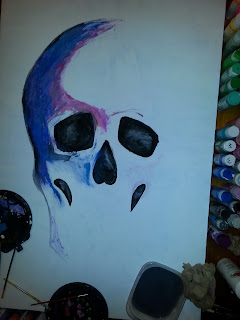
 I started with the darkest parts on the painting and then later
shaded the edges out to flow.
Just starting, do you see all the paint I used!
Almost done, except I moved the cheek hollows down.
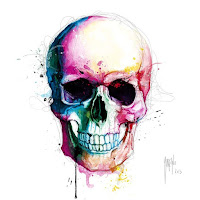
I also showed my inspired original photo next to it.
I didn't like the original skull structure so I changed it up a bit.
This is the original artwork
Kristina wanted something in the background so I
watered-down paint & dripped it.

                    Tara's Birthday gift

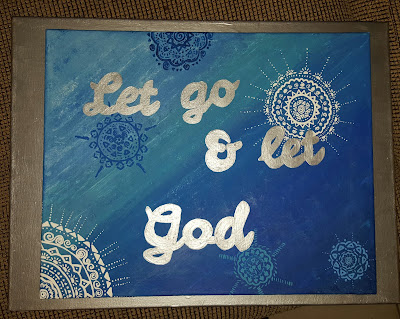
She often says "Let go and let god" when she is frustrated about one of our 911 callers not giving enough information. (BTW I'm a 911 operator) I thought this would be a great reminder.
I painted a slanted blue ombre, I ruffed up the canvas a little with all the layers of paint I put on (because I painted so many backgrounds before I could decide) and then I painted the quote in silver metallic and added decorative mandalas.
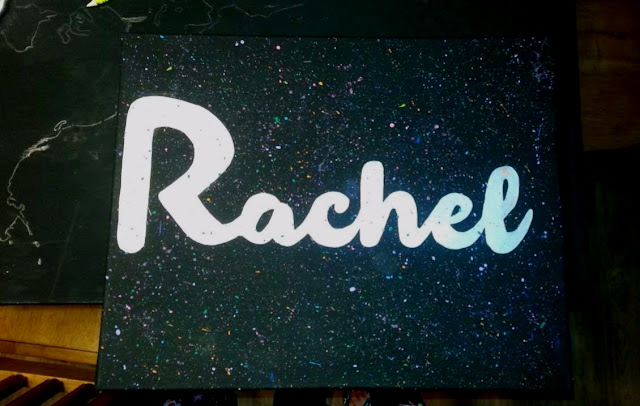
Rachel's Birthday gift
I painted a black background, then splattered on all the bright neon colors I could
 find and then painted her name in metallic silver. 
Maria's no-occasion gift
Hamsa hand
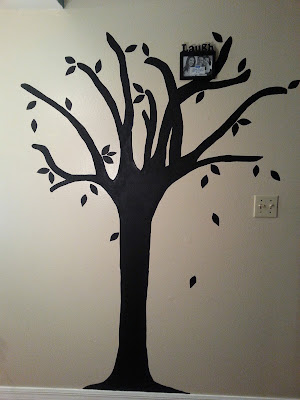
Tree in my hallway
We actually have painted over this now but when I painted it
I added more frames and it was about 4 ft tall. 
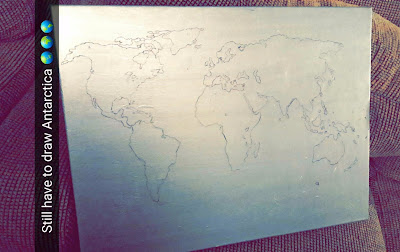
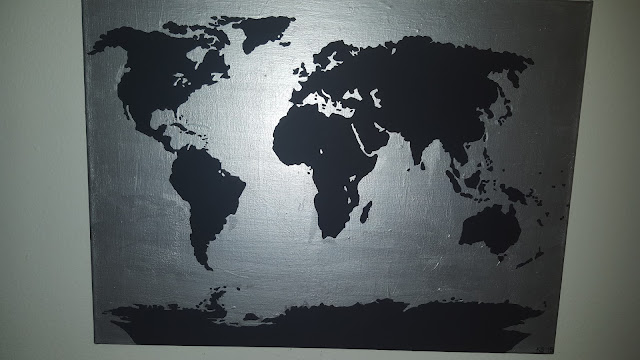
Map of the world 
Metallic silver background. I traced the world in pen from a paper
outline that I cut out.
Finished
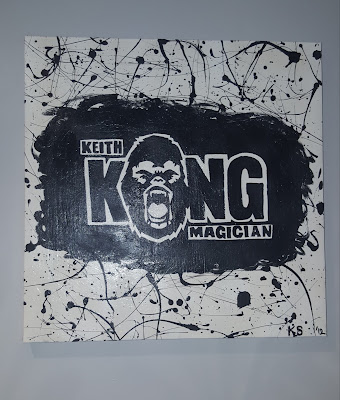
Keith's 18th Birthday present
Keith's logo
I made a cut-out of his logo and traced it on a white canvas.
After I painted the logo and let it dry I covered it up
and splattered black paint on the background. 

Wednesday, September 2, 2015

Things I've made but haven't documented the process


I've made a lot of things that I did not document all the way through but I want to share anyways.

Baby Girl Diaper Cake for a Baby Shower
Tiffany's baby shower gift
Supplies:
  • 1 box of size 3 Pampers swaddlers (I believer 164 ct) - I only used half ($25 for the box)
  • Baby girl ribbon
  • String
  • Gold plastic embellishment plate
  • Rubber bands (at least 15)
  • 1 teether
  • 1 rattle
  • 1 toy
  • Baby girl hat
  • Stretchy baby head band
  • 1 pack shrink wrap
The base is a plate from dollar tree
I then rolled all of the diapers (the same direction so it would all match)  
and placed a rubber band around them. 
I made a circle of five rolled diapers and then tied a string around it. 
After they were secured I took off the rubber bans. 
I repeated this step by putting more rolled diapers around the already made 
circle, tied it, took off the rubber bands. 
Repeat this step until you get a good-sized base.
Repeat the steps for the next 2 tiers.
I tied all the tiers with ribbon leaving enough room to make big bows as embellishments
 (This also hides the string holding it together).
I placed little baby toys, teethers, rattles around the tiers and added a baby girl hat & head band at the top. The best part of these projects is the shrink wrap, the only time I really use my blow dryer. 
Then top it off with some more ribbon!

Total: around $21

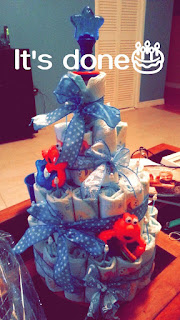
Baby boy diaper cake
Gina's baby shower cake
This was actually my first go at a diaper cake and I think it looks better
than the one above (mainly because this one is pictured before I put
on the saran- wrap) The theme was Sesame Street which I found at the
Dollar Tree. I also added Q-tips to look like candles.

Total: $18

Drunk Barbie Birthday Cake
Brittany's gift

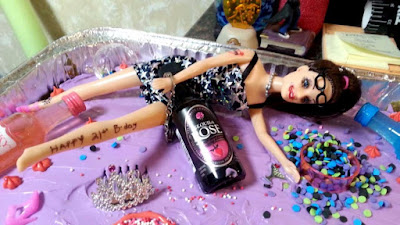
For my friends 21st birthday I made a drunk barbie doll cake. 
Which is pretty self explanatory.
I bought a barbie ($1) with a cute "clubbin" dress and added smeared
 make-up for also obvious reasons. My friend wears glasses so I was luckily able 
to find a pair from my old barbie toys 
I used sprinkles to mimic throw up and also inserted a small plastic shot glass 
into the cake and added sprinkles in it to look like a "puke bucket"
Leave one shoe off & scattered somewhere to make it look even 
more realistic to how the night will end
Then I add mini bottles of alcohol (I found the girliest ones - Kinky & Rosa)
Whatever you can find to add extra "umph" like mini handcuffs, 
small shot glasses/wine glasses and crowns.
Last but not least I added tattoos, "I <3 Mom" "Happy 21st B-day" 
and you can add whatever tattoo that your birthday girl really has to make
 it extra special!


21st Birthday survival/puke bucket
Maria's gift
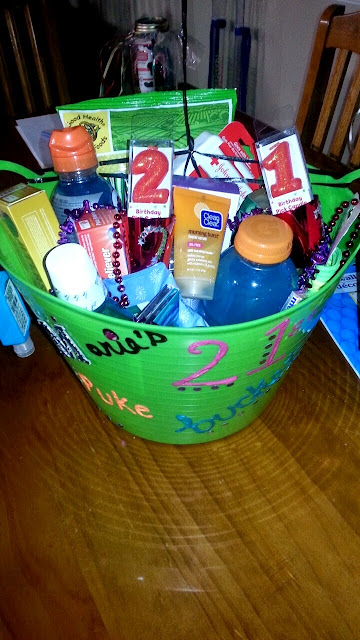
All this stuff is basically from Dollar Tree
So grab a large colorful bucket ($1) and personalize it
and then add all the things your friend needs to survive
a massive hangover : )
Supplies:
A full on picture (a tad blurry) 
  • Powerade/Gatorade (this is Maria's cure)
  • Mouthwash
  • First Aid kit (Maria ALWAYS stubs her toes)
  • Headache medicine
  • Make-up remover wipes
  • Mini face wash
  • Mini-shot glass necklaces 2 pk (personalized with puffy-paint)
  • 21 birthday candles
  • Condoms
  • Pregnancy test (more as a joke but you never know!)
  • Snack (I went with veggies straws because she is vegan)
  • Hand sanitizer that conveniently attached to the bucket handle 
  • Gum 3 pk
  • Sunglasses
  • Hair scrunchies 
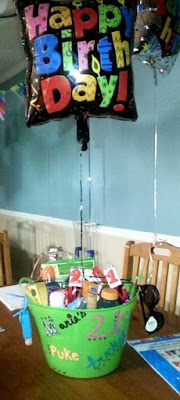
  • And a balloon attached (not pictured) 

Total: $19


Hand-made mini shirts
Keith's anniversary gift
My boyfriend is a mentalist & his logo is a gorilla (his last name is Kong)
I cut out 2 mini shirt patterns from 1 large shirt & sewed them 
together (inside out so the seam would not show)
I then used puffy pant to make his logo.
I will admit if I could redo this project I would because the way I
 spread the puffy paint it snagged the shirt & caused
cotton hairs to rise and mix with the paint
(But it's still cute!)
I also inserted two magnets (one in each Gorilla) where their
lips are so they would "kiss" but I suggest using strong magnets
because the material between them makes it hard
to keep them together. 

Total: $2-$1 per gorilla (Dollar Tree)
I already had the old shirt, puffy paint, & magnets


Bachelorette crown
Liz's bachelorette crown
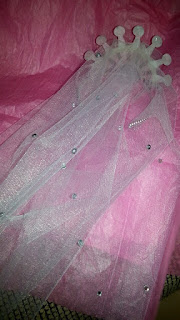
I bought a Dollar tree crown (they only had Mardi Gras at the time)
I had to remove the Maridi Gras colored jewels up top and replaced them with 
silver jewels I already had on hand with hot glue. I bought a small roll of tulle 
from Dollar Tree in the wedding section. I cut up 6-7 long pieces 
of tulle (the strips are approximately 5-6 inches wide so you'll 
need multiple strips) I scrunched the tulle just a bit & then hot glued
 each strip to the back of the crown towards the top. I then hot-glued
silver jewels on the tulle to make it look more authentic and festive.
I found a large sheet of black jewels at Dollar Tree and
hot glued on "BRIDE"
Total: $3 
but I ended with extra materials for another project (tulle & jewels)


Bachelorette sash
Liz's sash
I can't remember the exact measurements for the sash material
but really I just eyeballed it. I found a wide ribbon at 
Joan's Fabric Store (my 2nd favorite store) and luckily
had a 50% off coupon. I used some left over iron-on letters
and jewels to decorate. I sewed together the bottom part of 
the sash and used fabric glue for the jewels. 

Total: I also can't quite remember but less than $3

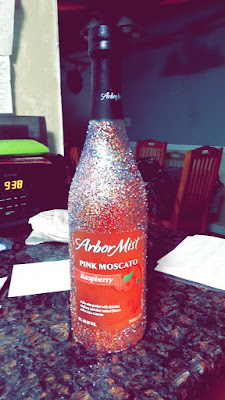
Glittered Birthday Bottle
Kedisha's Birthday bottle
I taped off the label to keep it clean from the glitter and then
sprayed Elmer's Spray Adhesive. I quickly added a mix of all the 
glitter I had on hand. I sprayed if with the adhesive again and gave
it an extra coat. After it dried I sprayed it with clear spray paint
so the glitter would not fall off or rub off when picked up. Add
some decorative ribbon and its a perfect party gift!

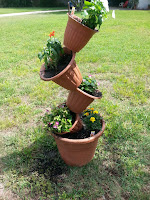
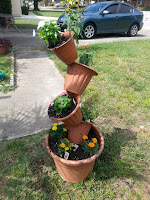
Mother's Day Topsy-Turvy Planter

I made this for my momma in 2014 (it was a big thing then).
I used a large planter that I had on hand and bought
4 Dollar Tree planters. The first 3 smaller ones (from 
the bottom) were all the same size and the top one
is the smallest. I went to Home Depot and bought (approximately)
a 7 foot nickel pole (about $8). Now I asked one of the employees which 
 type of metal pole do they recommend for outdoor and they
did say that the one I bought (the cheapest) would rust fast. 

Any-who you need a long pole so it can be buried at least 
a foot in the ground. I stuck the pole through the pot into the ground
(Find a place that you want to keep it) I added soil and
then added the rest of the pots, slanting them to get the look. 
Adding the soil also keeps the pots slanted. I added the flowers after
which I also bought at Home Depot (about $1 each)

Total: $16

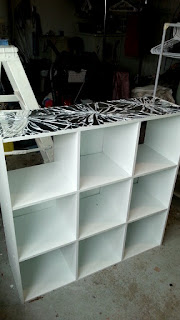
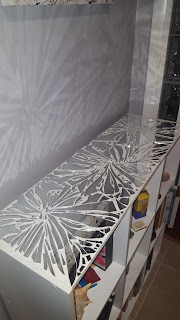
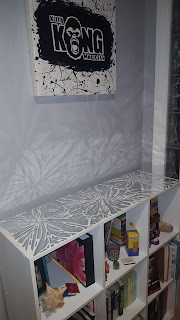
Broken Mirror book shelf
A DIY for me!
I found the book shelf on the curb during one of our scavenger hunts
 (my mom and I).
The shelf had minor water damage to the top from cups so I knew
 I had to cover it up some how. I also found a large mirror on the curb but when I brought it home it cracked! So I
 re-purposed my "bad luck" buy breaking
it further into small pieces. 
I bought a small bucket of white grout from Home Depot ($5) and then laid
out the glass. I grouted multiple times
(this was the hard part) and it was hard to clean the grout film from the glass.
But after it looked
AMAZING!

Total: $5